We will resume posting on our blog Monday, December, 1st. See you then!
Wednesday, November 26, 2008
Happy Thanksgiving!
We will resume posting on our blog Monday, December, 1st. See you then!
Monday, November 24, 2008
Making Your Own Personal Magical Hat
1. Cheap.
2. Easy.
3. Fast.
4. Fits both me and my son. Magic, I tell ya.
Once upon a time, in a library very close to my home, while trying to browse for inspiration and at the same time prevent one child from using the rolling step stool as a vehicle which careens down aisles at the speed of light as well as prevent the other smaller child from pulling off the shelves every single book within reach, I stumbled upon a book called Super Crafty. And in this magic book was a magic project... the sweater hat. Now, I feel okey-dokey about presenting the directions for this project here because my sweater hat took a drastic turn in design from the original hat presented in this magical book. It was definitely the inspiration, though, so here's another shout-out to Super Crafty.
All righty... here's what you need.
1. Sweater with ribbed bottom edge- can be wool, cotton, whatever. Practically any size will work.
2. Sewing machine
3. General sewing stuff... scissors and thread.
And where, you ask, did I purchase my lovely sweaters? Why, that would be at the lovely thrift store down the street where clothes go on sale for $1. Yes, that's ONE DOLLAR. Now, the sweaters I bought aren't super duper cute or anything... frankly, they were right at home in the thrift store. But, I know that one of these days I am going to come across the perfect little striped Gap sweater that is in the wrong size for me to wear but the perfect size to reincarnate into a sweater hat for myself.
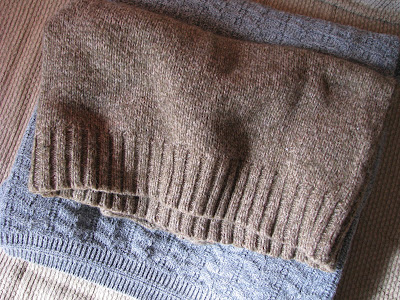
So, the important thing about your sweater is that it has a ribbed bottom edge since that will be the edging for your new hat. Here are my $1 beauties...
1. Wash your sweater. Because really, people, it came from the thrift store. If you're using your own personal sweater to make this hat, then I release you from washing it again. I have germ issues, though, so hey, a little extra washing won't hurt.
2. Size your sweater to your head. In my case, I wrapped the sweater edge around the head of my not-so-excited-about-this-project son. (And that would be why there is not a picture of this step.) Anyhow, I basically just stuck the bottom edge on his head and then pinched the two sides together at what seemed to be a comfortable size to get the length; mark with a pin. Squeeze the two layers together at the top marking that with a pin.
3. Lay the sweater out flat and cut out two rectangles from the sweater. Make sure to cut the sweater larger than your pin marks as you want to leave enough for the seam allowance. In my case, I actually cut the rectangle while keeping the original side seam (on the left in the pic) still intact. In hindsight, I wouldn't do it this way again as that seam ended up being bulkier than I would have liked. I would simply cut two rectangles from the middle of the sweater.
4. Turn your sweater piece(s) inside out and sew the open side (or sides if you cut your rectangles from the middle) together. I used a straight stitch and made sure to reinforce the stitches at the starting and stopping places. (If you are concerned about the strength of the stitches or unravelling, you can do a straight stitch and then go over the edges with a zig zag stitch. Honestly, it seems strong enough to me, though.) Leave the top open. The stitched side is now on the left in the pic below.
5. Stick the little undone hat on your head and arrange it properly across your forehead. Squeeze the open sides of the hat together at the top and mark with a pin. Continue down from the crown of your head, squeezing the sides together and marking with a pin. Here is what mine looked like after doing one side of my son's head...
See the half circle of pins on the right side? I just tried to match them and eyeball the left side.
6. Stitch along the marked half-circle, being careful to try and gradually blend the stitches along the half circle into the stitches on the side of the hat. Honestly, you could simply start from the beginning by pinning out this cloche shape and stitching it all at once... I was just unsure of the fit, so I decided to split the steps.
7. Cut the extra fabric away and trim your extra threads. As you can see, eyeballing the opposite side of the hat didn't work out so well for me! Turn the hat right side out, though, and you can't tell! Ah, but that's the beauty of the magic hat... it is a hat that forgives.
See?
You can leave your hat as is or try to tailor it a bit more for fit. I went in and added another line (a straight line this time) of stitching perpendicular to the original line across the top. This made the hat fit better along the front and back of the head.
And what makes this hat so great? Besides the fact that it is cheap, easy, and fast? It seriously does fit both me and my kid. Magic.
I have no idea how that happened, other than knits are stretchy and forgiving! So, be assured, this project doesn't require a whole lot of precision. Did you hear me? I said it is *easy*. Whole thing took me less than 20 minutes and wouldn't take as long next time. So, sum total of time for this project... 20 minutes. Sum total of monetary investment in this project... $1. Love it.
Your hat will vary based on the sweater you choose. For instance, my sweater happened to be a pretty thick knit and is wool. A lighter sweater in a finer gauge yarn and material will yield a hat with smoother seams, etc. When using a striped sweater you'll want to make sure that the stripes match up as you stitch.
I plan on making myself one of these (not to share with my lovely little one) and embellishing it up with a stitched flower with a button in the middle. I may even get adventurous and add a little microfiber liner so that I can wear it while skiing next year. Cause a girl's gotta look cute on the slopes.
By the way... this would make a brilliant last minute gift for the holidays... I'm just sayin'.
Later!
Jessica
Thursday, November 20, 2008
Holiday gift-giving made easy!
This year I have resolved to de-stress my family's Christmas, and I don't know about you, but organizing is the key for me. Often that means getting things crossed off my list early! One thing that I tend to put off to the last minute are teacher's gifts, so this year that is getting bumped right to the top. I'm sure I'm not alone this year in trying to come up with ways to economize for the holiday without feeling like I'm scrimping, so I was pleased with the way this came together.
I started out with some kraft coffee bags that I got from Papertrey Ink and some 'gourmet' hot chocolate that I found at Costco.
I stamped the coffee bag and layered some coordinating pieces on to it. It's coming together great - but that's when it hit me, this still needs a little something extra! That's when I remembered that I had all the supplies I needed for making chocolate covered spoons right in my pantry.
If you've never done this before, it is fun and so EASY, I bet you'll be itching to give it a try! You start with melting chocolate wafers:
There are a couple of ways to melt the wafers, including in the microwave. I prefer using the double-boiler method (and don't worry if you don't have a double-boiler - I don't think many of us do any more!). You simply heat up some water in a larger pot, and fit a smaller pot or stainless steel mixing bowl on top of it. The simmering water will melt the chocolate, but since you don't have the chocolate directly on the heat, it isn't as likely to burn (are you hearing the voice of experience in that statement?! Mmm hmm!). ;)
Just stir the chocolate until it has melted (stirring=good!) and then dip your spoons in! Here, since I was giving them as a gift, I used plastic spoons. I did pick a more solid plastic spoon, as I would think the lighter-weight ones could potentially melt, as well.
You're going to want to let them set up, so have a mat or cookie sheet nearby for placing the spoons on. If you're impatient (like me!) you can place them in the fridge to speed up the process.
Once they were well-set, I started wrapping them. To do that, I cut sandwich bags in half vertically and placed the spoon in the corner. I cut off the top of the sandwich bag and tied it with a piece of coordinating ribbon. So simple!
(Oh, and how about that leftover chocolate? Well, I pulled out a bag of pretzels from the pantry, too, and made a surprise after-school treat for my kids. You have to test the chocolate, don't you?!)
The best thing about this gift is that it will actually be used by your recipients! It's a simple, low-cost way to let the teachers, co-workers, neighbors, etc. know that you're thinking of them.
Be well.
Supply List
Stamps: (Polka Dots Basics, Holiday Treats) Papertrey Ink
Coffee Bag, Ribbon, Ink: Papertrey Ink
Die cuts: (Labels One) Spellbinders Paper Arts
Hot chocolate: Costco; Spoons, chocolate wafers: grocery store
Monday, November 17, 2008
Make your own button ornaments
Step 1: Trim a piece of wire to about 9". I used floral wire which has a cloth type of coating. Use the pliers to create a small loop at one end.
Step 2: Thread the buttons on the wire until you get the desired length for the wreath. Mine is just a tad over 2" in diameter. After all the buttons have been added, push the straight end of wire through the looped end and secure. Trim the excess wire.
Step 3: Shape the wreath as desired. Add about 3-4" of ribbon to hang the wreath on a tree or embellish a gift. The ribbon should be added to the twisted wire; it leaves a little gap in the wreath and the ribbon covers that gap, nicely. Then, add another ribbon to accent, if desired.
Again, a photo of my finished ornament. Of course, my Christmas tree is not readily available, yet. So I had to use my faux pine tree- which is covered in feathers
Sunday, November 16, 2008
We Have a Winner!
So, now for the winner of my RAK....
The winner is....
.....
....
.....RAE!!!! Congrats. Email me and send me your address. ;)
Have fun using all of these new vintage images resources!
Thursday, November 13, 2008
Fun with Vintage Images
This first project is a card I made using a Crafty Secrets Cotton Scrap. I cut it out, frayed the edges and added crackle medium over the top of it. It really has an antique look to it!
This next card uses an image from Crafty Secrets' Holiday Booklet. I added some Melissa Frances paper to go along with the shabby theme. It can be seen in this month's Paper Crafts Magazine.
This next project uses another image from the Crafty Secrets booklet. I added some stitching to the edges and some pop dots to give it dimension and texture. The Pink Paislee paper also adds to the vintage effect.
This next card uses an image that I found online. If you do a search, you will find that there are many free images available for use. You do need to read the fine print, though, to see how you are allowed to use them. I found this one through a google search. (©2000 Denise Van Patten - Doll Collecting at About.com) I printed it out, added the glitter to the edges and used foam adhesive to mount it on the card front.
Vintage images aren't just for cards, though. They work really well on projects, too. Here is a gift card tin that I'd made using Crafty Secrets' Heartwarming Vintage Cuts. I layered lots of felt, flowers and the image onto the tin front.
And here is a little treat box for Halloween. I used a Melissa Frances label on the lid.
If you are interested in using some fun images, check out these resources. They are some of my favorites.
Free Vintage Images.Com
Vintage Resources
About.Com
Crafty Secrets Booklets
Crafty Secrets Cotton Scraps
Crafty Secrets Heartwarming Vintage Cuts
Melissa Frances Stickers
Melissa Frances Labels
B.Shackman
Finally, I leave you with a little giveaway.
There are a few Melissa Frances labels, some vintage stickers, some B.Shackman images, a Craft Secrets stamp set and some trim.
Post a comment by Saturday, Nov 15 at midnight and I will enter your name into a drawing for these items. They will help you make your own fun, vintage projects. If you leave a link for another resource, I'll add your name to the hat twice!!
Thanks for stopping by and have a wonderful day!
~Anabelle
Monday, November 10, 2008
Recycle it!
Before throwing out empty food containers consider recycling them as container for holiday gifts, cookies, or any treats. Some great examples are nut containers, coffee comntainers, creamer tins, Mason jars, soup cans, large oatmeal containers, CD cases ect..
Here's a few examples:
An oatmeal container made into a vase for silk or dried flowers.
A empty nut conatiner made into a gift pail. I added curled wire as a handle.
An empty creamer tin, add your own cocoa mix.
Make your own cocoa recipe from Family fun. This would be great in a Mason jar as well and to do with kids as teacher gifts!
RECIPE INGREDIENTS:
2 cups nonfat dry milk powder
3/4 cup sugar
1/2 cup unsweetened cocoa
1/2 cup mini semisweet chocolate chips
1/2 cup powdered nondairy creamer
1/8 teaspoon salt
1. Measure all of the ingredients into a mixing bowl and whisk them until they are evenly blended.
2. Store the mix in a tightly covered container at room temperature until you're ready to package it. Makes about 4 cups of mix.
And we can't forget the pets, this is a recycled coffee can with a lid I found at a thrift shop. I added some paper and felt.
Hope that gives you a few ideas to start saving those containers. Have a wonderful day!
-Sherry
Sunday, November 9, 2008
drumroll please.....
Life At Camellia Cottage said...
How perfect that this is your topic today! I had just posted about how my hubby and I met through a dating service 24+ years ago, and how grateful I am for him.
Thanks! Becky G.
CONGRATS Becky!!! I've already sent you an email and I hope you enjoy your goodies!
It was really great to read who everyone is thankful for and I am so happy that most of you already send out cards this time of year.
Thanks again!
Thursday, November 6, 2008
time to be thankful
It's also a great time to be thankful and express our gratitude to family & friends! Why not take a moment this month and send your family & friends a little note of gratitude? Pull out those supplies, let your kids join in and just write a simple, heartfelt note thanking someone. Let them know how thankful you are that they are in your life!
Here's some great quotes to motivate you, along with some examples of a few easy cards that you can do.
Silent gratitude isn't much use to anyone. ~G.B. Stern
We can only be said to be alive in those moments when our hearts are conscious of our treasures. ~Thornton Wilder
Thanksgiving, after all, is a word of action. ~W.J. Cameron
He who thanks but with the lips Thanks but in part; The full, the true Thanksgiving Comes from the heart. ~J.A. Shedd
Feeling gratitude and not expressing it is like wrapping a present and not giving it. ~William Arthur Ward
Supplies used:
Pattern Paper: Paper Salon Spice Foil Falling Leaves
Rub-ons: Paper Salon Spice
Sticker: Paper Salon Spice
Other: Pop-up Dots
Supplies used:
Cardstock: Bazzill
Stamps: Inque Boutique, Heidi Swapp
Chalk Ink: Colorbox, Paper Salon
Ribbon: Source unknown
Button: Autumn Leaves
Decorative Scissor: Fiskars
Supplies used:
Cardstock: Bazzill Basics
Pattern Paper: Bo Bunny Autumn Wood
Stamps: Paper Trey Ink Holiday Tags, Paper Salon Fall Frolic
Ink: Ranger Distress
Lace: Source unknown
Die-cut: Quickutz Scallop Circle
Tools: Provocraft Cuttlebug
Punch: EK Success large circle, Creative Memories corner rounder
Us gals here at The Pursuit of CraftYness blog are very thankful for all of you! So I put together a little giveaway as a thank you.
All you need to do is post a comment right here and tell me who you are thankful for or who you plan on sending cards to over the next few weeks. And like always, if you post some of those cards...please share your links with us. We always enjoy seeing what our readers are doing!
You have until midnight Saturday, November 8th to post your comment here (one per person please). I will pull a name and announce the winner no later than Monday the 10th. Please post your email address so that I can contact you and get your package out right away!
THANK YOU for all your kind words, sharing your amazing projects and hanging out with us here!