Yes, I'm talking heat embossing. That timeless technique that never fails to WOW a non-stamper. (Yeah, notice I said non-stamper...because I'm going to let you in on a little secret. The rest of us know just how easy it is, and after this post, you will too! Shhh, don't tell the non-stampers - we still need that re-affirming WOW every so often!)

So, obviously you're going to need a few things. Stamps, ink, heat gun, embossing powder - they're the must haves. I also like to have a silicone sheet, a funnel tray, an embossing 'buddy' and a paintbrush.
What's important? Let's start with your ink. You can't just use any ink, so you need to either use a pigment ink or a different ink that will stay 'wet' long enough to grab the embossing powder. My fave? Versamark, but I also like embossing with Versafine (which isn't supposed to be able to be done, really, but you can if you work relatively quickly).
Every so often I see questions on message boards asking about the best brand of heat guns. I never have much to contribute to those conversations because I am still on the first one I bought - a Marvy Uchida one from my local craft chain store (which means you can use a coupon!). I've had this one for nearly seven years now, and it is still going strong. (And if I just jinxed myself, I would replace it with this exact model!) One thing I will tell you - you can't skimp by with a hair dryer, so save yourself the frustration.
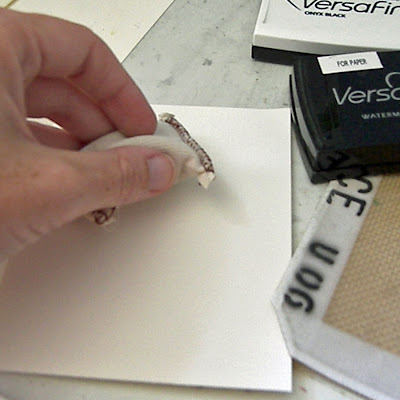
Here's what I like to do first, rub my Embossing Buddy across my paper. I actually bought this (again, craft chain, in the rubber stamping section, for a couple of dollars). As you can see, it's really plain and easy to overlook, but I find it to be an important step. It cuts down on the static on your paper, which leads to less stray pieces (more on this in a minute). I've seen where people actually make their own little sacks from fabric and corn starch; I haven't tried this personally, but if any of our crafty friends have, I would love to know how it works!

Next, you just want to stamp your image as you normally would, just remember to think about the kind of ink you want to use. Here, I chose Versafine Onxy Black so you would be able to see the contrast a bit better. Make sure you get a good image and then with relative speed (don't go answer the phone!), you're ready to move on to the embossing powder.
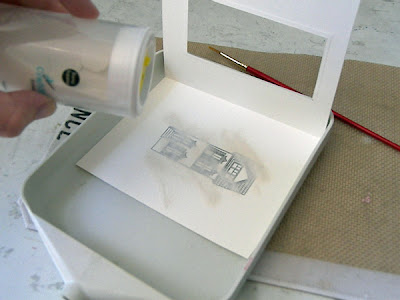
I like to lay my image in a funnel tray. This catches all the spare powder (which you can put back in your container to use again). Just sprinkle it on your image, covering it well. Use the paper as a sort of sifter, shaking it slightly back and forth to cover your image completely.
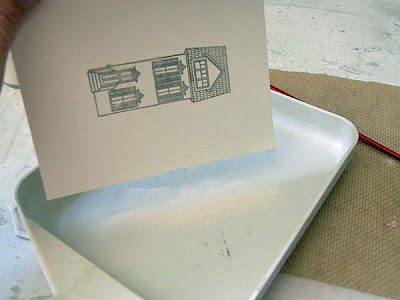
Now it is time to tap off your excess. Again, you can do this over a funnel tray (or a piece of paper) to save it for next time.
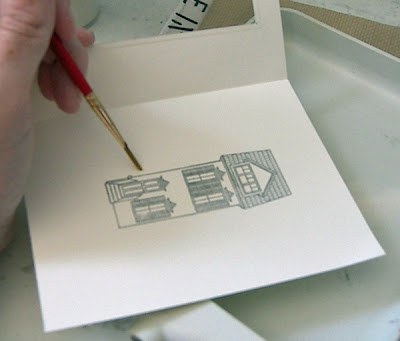
I choose clear embossing powder(EP) for this project, but if you're using a colored EP, this is the time that you should really examine your piece for "stray" pieces of embossing powder. See, this is what separates the men from the boys, so to speak. I use a paint brush to wipe them off of my project (because after you try this once with your finger, you'll be muttering all sorts of fun words under your breath!). It's important to remember that when you're embossing, static is NOT your friend, and if you attempt this with your finger, you will create more static problems than you will solve. A paint brush is a good way to avoid that.
Why are the strays so important? Well, those little strays aren't going to blow away when you turn on your heat gun, they're going to melt into exasperating little blemishes that will turn those mutterings into full-fledged outbursts. Trust me. ;)
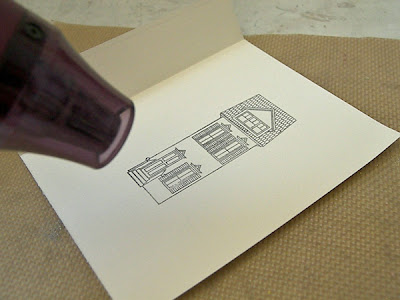
Once you're stray-free, you're ready for the show! Protect your work surface with something that can take some heat, plug in your gun, and if your piece is small enough to take flight from the air from the heat gun, grab something with a non-metal handle to hold it down in a corner (I usually grab my dry-embossing stylus). Remember, it has to be able to take heat, but if it's metal, you're going to get burned when it heats up.
While you have your gun on, it's important to remember a few things. One, paper is flammable. (No first hand knowledge of this one, thankfully!) Keep your gun moving over the powder, don't be tempted to linger too long in any one area, because even if it doesn't catch on fire (lol), you will be very likely to see a scortch mark. Two, it takes a little longer than everyone thinks the first time. What's going to happen is this - you will see it melt. It's like magic and the first time is pretty darn cool (and the second time, and the thousandth). When it happens, you know. And when it happens all over your project, you're done.

Those are just the very basic steps, so if you haven't tried this before, I think you are now ready!
When you're ready to venture out, you can start exploring different colors of ink and embossing powders. There are many options! If you use Versamark, you have the perfect color ink for any color EP. However, if you're using different colors of pigment ink, keep in mind the color EP you choose. You can use it to accentuate a color (try white pigment ink with white embossing powder for a great, solid white look that's hard to beat!) or to make contrasts. And clear embossing powder is a great thing to have on hand to go with all your inks.
Distess embossing powder is a great product if you're looking to venture even further into the world of embossing. It is manufactured by Ranger and designed to go with their Distress inks. It is an interesting concept because it is made for an inconsistent application - you go about the embossing process just as I outlined, only at the end of heating, you rub off some particles that are designed NOT to melt. It gives a great worn feel - hence, Distress, I guess! ;)
Hopefully this gives you the confidence to go ahead and give this great technique a try. There are other great tips that you may be interested in as you advance, so if you find that is the case, let us know and we'll be happy to discuss them here!
Be well ~ Jenn


7 comments:
thanks Jen. That was a fabulous tutorial. I have embossed before, but learning it again, never hurts. :)
I can do it. I can do it. I can do it! Time for me to bust open those new jars of EP & attempt this again. Thank you for all the tips (especially the paintbrush one) and step by steps. I think this will help me a lot, thank you!
Wow did you cover everything! If I didn't know it before I sure do now! I still have my original heat gun too and mine has to be over 15 years old!
Oooooooh, I'm so tickled to see that someone else uses a tiny paintbrush to clear away any stray particles!! Great toot! And you're sooooo right ... new stampers just LOVE this technique .... and so do some of the rest of us too. *wink*
~Bev
THANKS!!you're an artist
Great story as for me. I'd like to read a bit more concerning that topic. Thank you for sharing this info.
Joan Stepsen
Escort Cyprus
Cool blog as for me. It would be great to read something more
concerning this topic. Thank you for posting this info.
Gerda
independent Kiev escort
Post a Comment